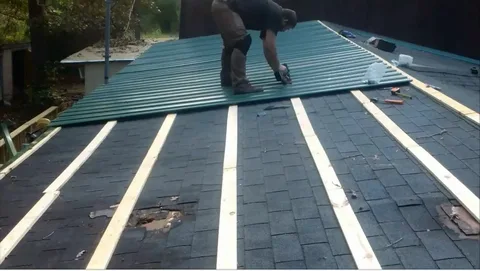
Knowing how the installation process works will help you make wise decisions, regardless of whether you’re a do-it-yourself enthusiast or want to employ a professional. In this manner, you can determine whether an upgrade to a metal roof is warranted. In this article, the basic steps of how to install a standing seam metal roof are covered so that your house looks great and remains dry for many years to come. You’re ready to see how to install a standing seam metal roof like an expert now that you know what makes these roofs so great:
How to Install a Standing Seam Metal Roof? Get the Roof Surface Ready
Make sure the surface of your roof is prepared for action before beginning any metal roof projects. So let me give you the dirt on properly preparing your roof. To start, you must remove all of the outdated roofing material until the roof deck is exposed. It feels like a new beginning where the old is gone and the new is in. Next, give the roof deck a thorough inspection. Examine any damage or indications of decay. Don’t worry if you find any problems; just get your hands dirty and fix what has to be fixed. Consider it a kind of roof health examination. Go ahead and install some roofing underlayment over that deck to provide an additional layer of moisture protection. It’s similar to painting and applying a second coat to ensure everything stays nice and dry. After completing these preparatory tasks, you’ll be ready to start installing that standing seam metal roof.
Set up The Eave And Drip Edge Flashing
Water is kept away from the roof edge with the use of eave flashing and drip edge. This is how to put them in: Roofing screws are used to fasten the drip edge along the eaves. Overlap drip edge sections by a minimum of two inches. Make sure the eaves flashing extends above the drip edge by attaching it along the eaves.
Measure, then cut the panels.
It is now necessary to start measuring and cutting. To determine the desired width of the metal panels, measure the length of your roof. Remember to account for some overhang to preserve the sharp appearance and safeguard your edges. Now that you have those measurements finalized, it’s time to gather your supplies. Roofing snips are a classic option, but if you’re feeling very tech-savvy, you can also use a drill bit that cuts through metal. Next, start cutting the metal panels in accordance with your measurements.
Put in Panels
You can begin putting the metal panels when you’ve cut them all. Take the actions listed below. Start at one end of the roof and use roofing clips and screws to fasten the first panel in place. Make sure the panel is level and straight by drawing a chalk line. Align the second panel next to the first, overlapping the seams. Using screws and clips, fasten the second panel in place.
Proceed in this manner, climbing the roof.
Incorporate Ridge and Ridge Cap
It’s time to take care of the ridge after those panels are put. Consider installing a ridge vent if your roof is in need of some ventilation. In order to allow air to pass through your roof, place it correctly. You’ll now require a ridge cap to complete the transaction at the top. Install it over the panels or the vent, based on how your roof is configured. Screws are used to firmly anchor the ridge cap. This simple procedure guarantees that your roof is weatherproof and well-sealed without adding any extra flair.
Put Sealant on
When it comes to keeping water out of your roof, make sure it stays as tight as a drum by taking your time applying roofing sealant. Apply it liberally along the seams where the panels join to form a strong seal against any possible leaks. Remember to also take care of any roof penetrations, such as chimneys and vents, as water can infiltrate these areas covertly. Maintaining a dry and comfortable house and a leak-free roof can be achieved with a thorough sealant treatment.
Put The Closure Strips in
Your best friends when it comes to caulking the spaces between your metal panels and preventing water from seeping in are closure strips. To ensure a snug fit, insert the closing strips precisely beneath the overlapped edge of the subsequent panel. Next, fasten them firmly with some reliable roofing screws to ensure they are functioning as intended.
Complete the Eaves
Installing the eave flashing such that it perfectly overlaps the drip edge and forms a seamless barrier against water is the first step towards finishing off the eave region and making sure it’s rock-solid against any moisture. Then use roofing sealant to seal the seams for an additional layer of security. The combination of eave flashing and sealant not only deters water but also fortifies the weak areas of your roof.
Examine and Uphold
After installing a standing seam metal roof, it’s critical to carry out routine maintenance and inspections:
- Examine any broken panels or loose screws, and replace them as necessary.
- Remove any debris to avoid water accumulation, such as branches or leaves.
- To keep a watertight seal, check the sealant and reapply as needed.
Conclusion
Your home’s longevity and appearance can be improved with the gratifying project of how to install a standing seam metal roof. You may accomplish a good installation by following these guidelines and taking into account the supplies and equipment you’ll need. Don’t forget to have your roof inspected and maintained on a regular basis with the assistance of a reliable, qualified roofing company. The only way to guarantee that it will keep your house safe for many years to come is to do this.

